How to Uninstall Visual Studio Code
Or: How I Use Vim As A JavaScript Developer
I've spent most of this year trying to convince my colleagues to ditch the wildly popular Visual Studio Code, and instead use Vim - the 46 year old text editor that comes pre-installed on every UNIX machine.
I'm personally convinced that it's how humans and machines were meant to communicate - but for most people that doesn't seem to cut it. I won't persuade anyone to use Vim unless it'll give them all the modern developer luxuries Visual Studio Code has spoiled them with. So I'll explain how to match all those features, without any of the Electron, Microsoft™ or reaching for the mouse.
Note that when I say Vim, I mean Neovim, which I use nowadays - mostly for the LSP integration, which I will talk about further down.
Plugins, or How I Learned to Stop Worrying and Love the Bloat
The first few times I had attempted to replace VS Code with Vim, I adamantly refused to install any plugins. I zealously shunned any notion of extending Vim with any functionality the application didn't ship with. "There's no point turning Vim into VS Code, the point is to use Vim." I'd think, as I struggled to remember the path to that one css file 10-folders deep in the project tree.
I've since come to admit defeat and have been proven entirely wrong - but rest assured every plugin I've mentioned here has been seriously considered before installed.
To extend vim with plugins, it's recommended you use a package manager. There are a few to chose from, but I use packer.nvim.
Packer
To install Packer:
- Git clone the repo into your
packpath(as described in the docs) - add
lua require('plugins')to your vimrc (~/.config/nvim/init.vim) - restart nvim and run
:PackerCompilefollowed by:PackerInstall.
Once installed, packer allows you to write a plugin specification in ~/.config/nvim/lua/plugins.lua, and install the specified plugins with the above commands.
Here's what my plugins.lua looks like (just to show an example):
return require('packer').startup(function ()
  use 'wbthomason/packer.nvim'
  use 'neovim/nvim-lspconfig'

  use 'tpope/vim-surround'
  use 'tpope/vim-fugitive'
  use 'tpope/vim-commentary'
  use 'tpope/vim-repeat'

  use {
    'nvim-telescope/telescope.nvim',
    requires = { {'nvim-lua/plenary.nvim'} }
  }
  use {
    'nvim-telescope/telescope-fzf-native.nvim',
    run = 'make'
  }

  use 'elixir-editors/vim-elixir'
end)
Git Integration
The Git integration you thought you couldn't live without in vscode can be surpassed by the Fugitive plugin.
Git Sidebar
In vscode, I would often use this sidebar just to swap between the files I had changes in. For this simple case, I use Telescope.
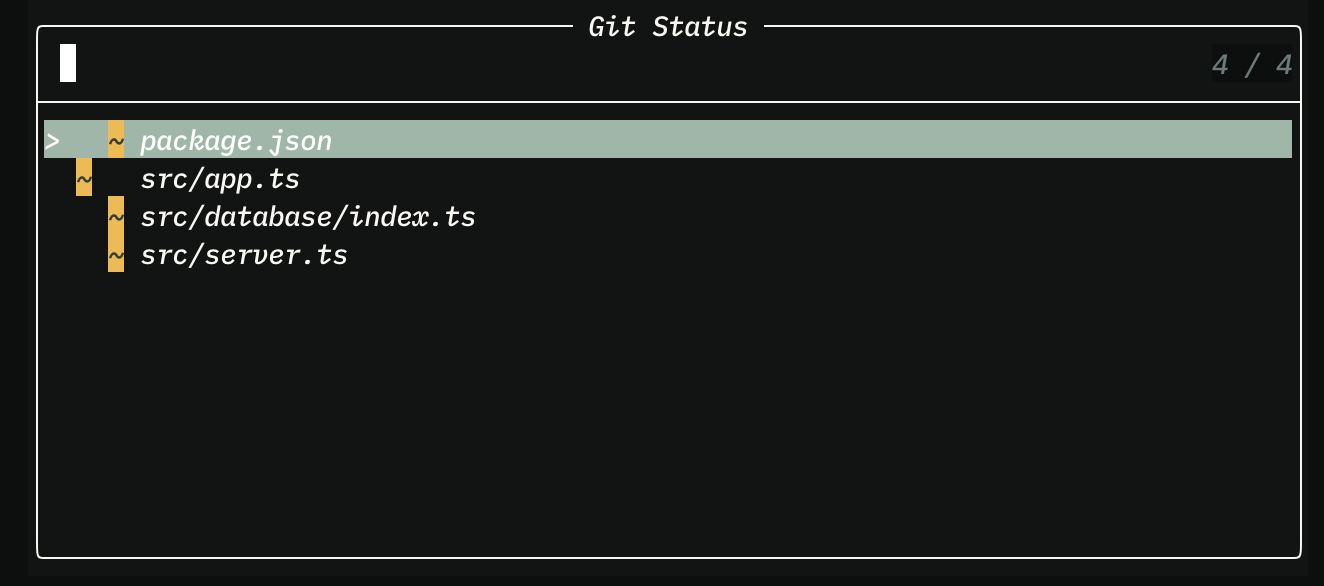
:Telescope :git_status
I find I use this enough rebind it to the space bar.
However, I also used the VS Code git sidebar to visually stage, unstage and commit files.
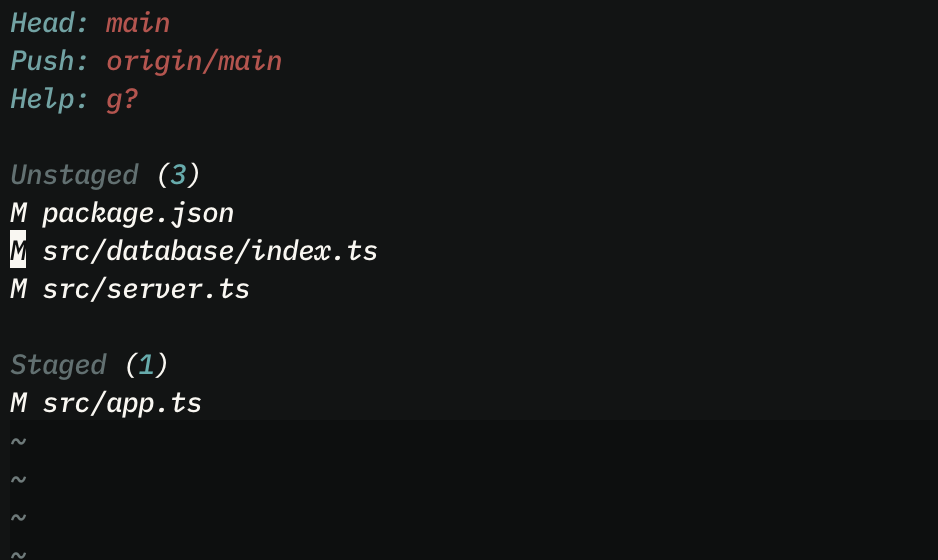 This can be done with the fugitive summary (opened with
 :G), where you can use s to stage and cc to commit.
Git Diff
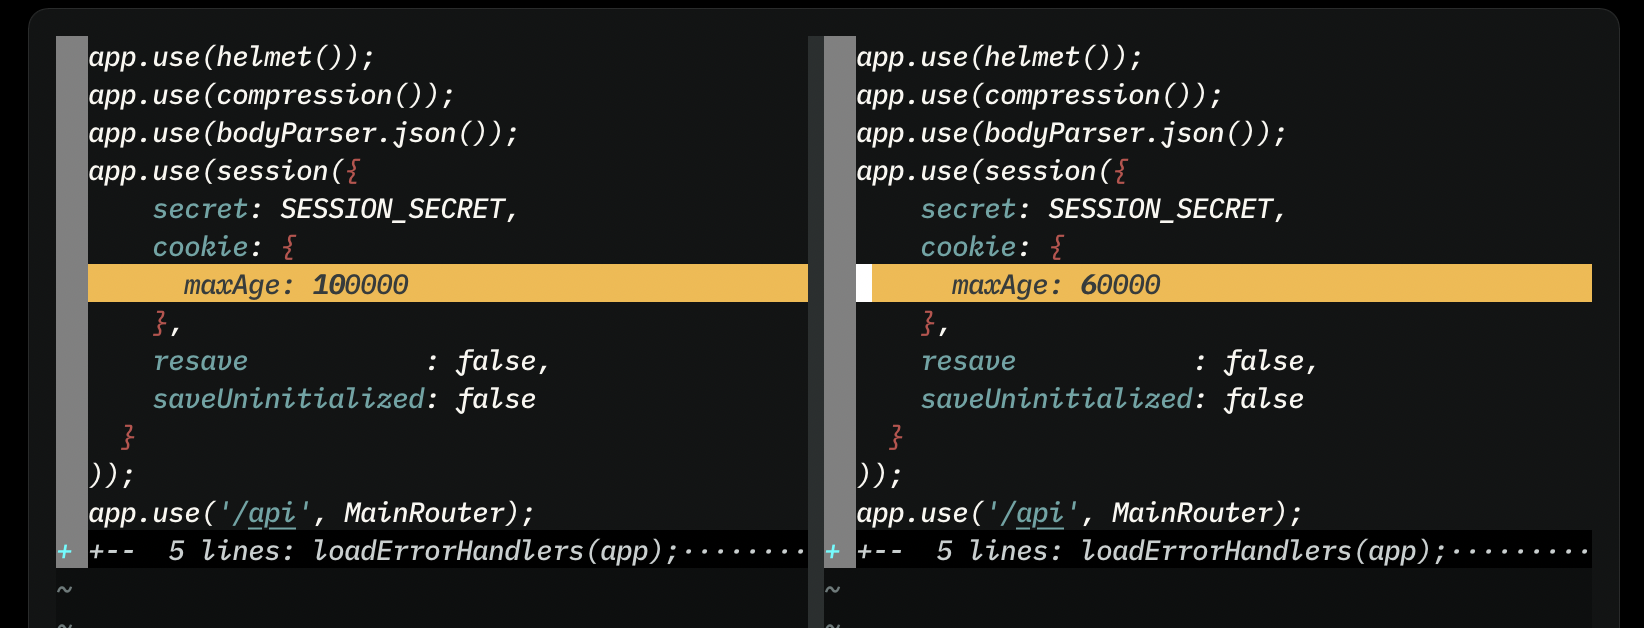
In VS Code, clicking a file in the git sidebar opens a diff. In the fugitive summary (:G), hit dd (or use the command :Gdiffsplit from any tracked file) to open diff like the one above.
Git Blame
:G blame will show you collaborator's names next to the lines they edited.
Language Servers
Much of VS Code's allure comes from it's useful language-aware autocomplete. The Language Server Protocol allows us to recreate the same functionality in Neovim. To start, install neovim/nvim-lspconfig.
VS Code comes with some excellent Language Servers by default. Thankfully for us, we can steal them and use them in Vim. To do this, install vscode-langservers-extracted. This will give you VS Code's helpful tools for HTML, CSS, ESLint and JSON. Once you've added them to your plugins.lua, set them up in your init.vim as follows:
lua lspconfig.jsonls.setup{}
lua lspconfig.html.setup{}
lua lspconfig.cssls.setup{}
lua lspconfig.eslint.setup{}
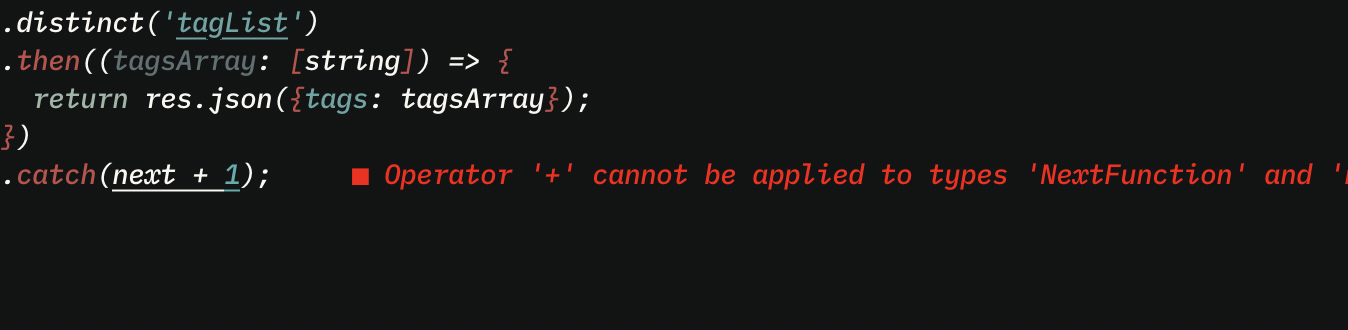
As you can see above, errors detected by the Language Server will appear automatically. To see which language servers are active for your current buffer, you can run :LspInfo.
Type Detection
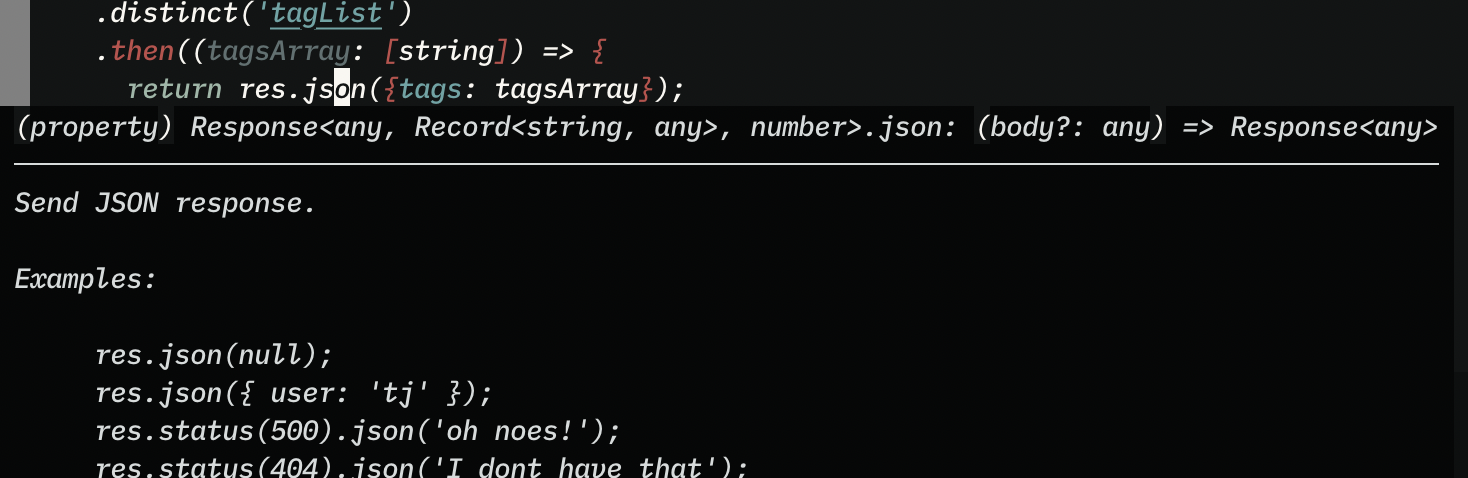
Hovering over an expression to find its type is a very useful feature of VS Code. To recreate this in Vim, we must first install the TypeScript Language Server. Now, with your cursor over an expression, running lua vim.lsp.buf.hover() will open a window like the one shown above with typing information.
It's, of course, personal preference, but I like to rebind this functionality to the K key (which doesn't stray too far from it's traditional meaning in Vim). This can be achieved with the snippet below.
nnoremap K <cmd>lua vim.lsp.buf.hover()<cr>
Autocomplete
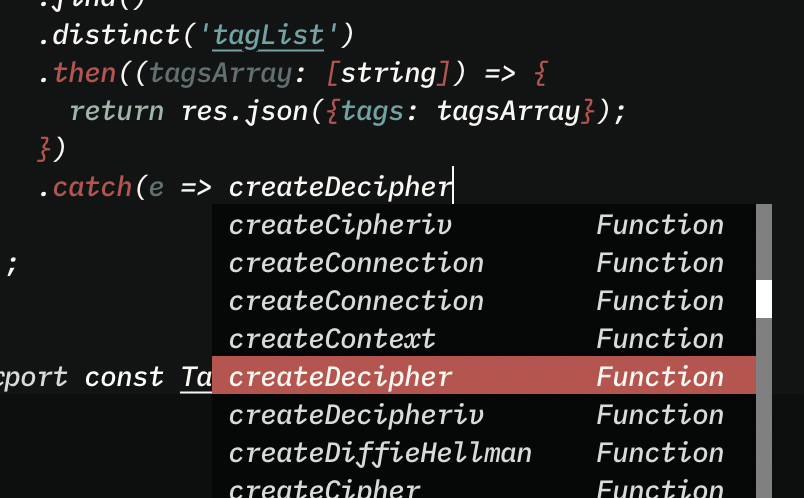
For minimal autocomplete functionality without any extra plugins, you can set the following in your init.vim.
set omnifunc=v:lua.vim.lsp.omnifunc
This allows you to press CTRL-X CTRL-O in insert mode to bring up a window like the one above.
Linting (on save)
Running lua vim.lsp.buf.formatting_sync() will format the current buffer using a supported language server.
To run this on save, simply add the following command to your init.vim.
autocmd BufWritePre * lua vim.lsp.buf.formatting_sync()
EsLint
Many JavaScript projects use ESLint - thankfully the extracted language servers we installed before gives us support for this.
I use the following snippet to skip the typescript language server I have installed and instead use the ESLint one on save.
autocmd BufWritePre *.hs,*.elm,*.ex,*.html,*.json,*.css lua vim.lsp.buf.formatting_sync()
autocmd BufWritePre *.tsx,*.ts,*.jsx,*.js EslintFixAll
Code Actions
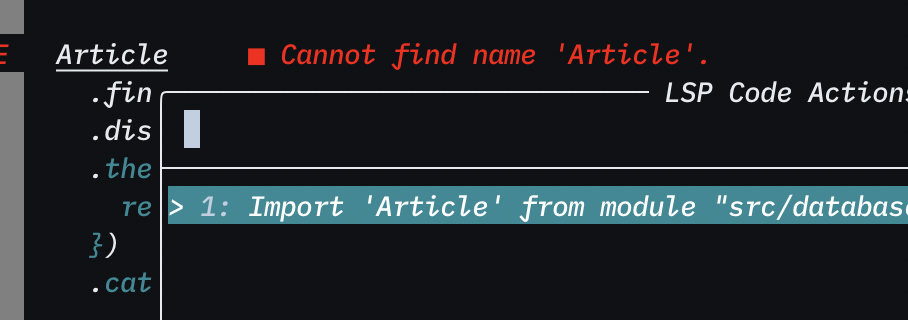 Code actions, such as organising imports, can be viewed and executed with
 :Telescope lsp_code_actions.
To place the Telescope window next to the cursor, I use the following command in my init.vim:
nnoremap <leader>a <cmd>Telescope lsp_code_actions initial_mode=normal theme=cursor<cr>
Go To Definition
In vscode, you can ⌘-click to 'click through' to the definition of a symbol. The same can be done in vim with lua vim.lsp.buf.definition(), which I rebind to gD.
"Commenting Out" Lines
In vscode, ⌘/ will toggle the current line between commented and uncommented.
The same functionality can be added to Vim by installing 'tpope/vim-commentary'.
This allows you to use gcc to toggle a line to a comment in a language-syntax-aware way.
File Search
By Name
The VS Code "file picker" is seriously handy - In Vim we can get the same functionality from Telescope.
The classic vscode file picker can be recreated with :Telescope find_files, which respects your .gitignore.
It's suggested that you also install telescope-fzf-native to improve performance.
Once you have installed it, remember to add the line below to your init.vim to load it on startup.
require('telescope').load_extension('fzf')
By Content
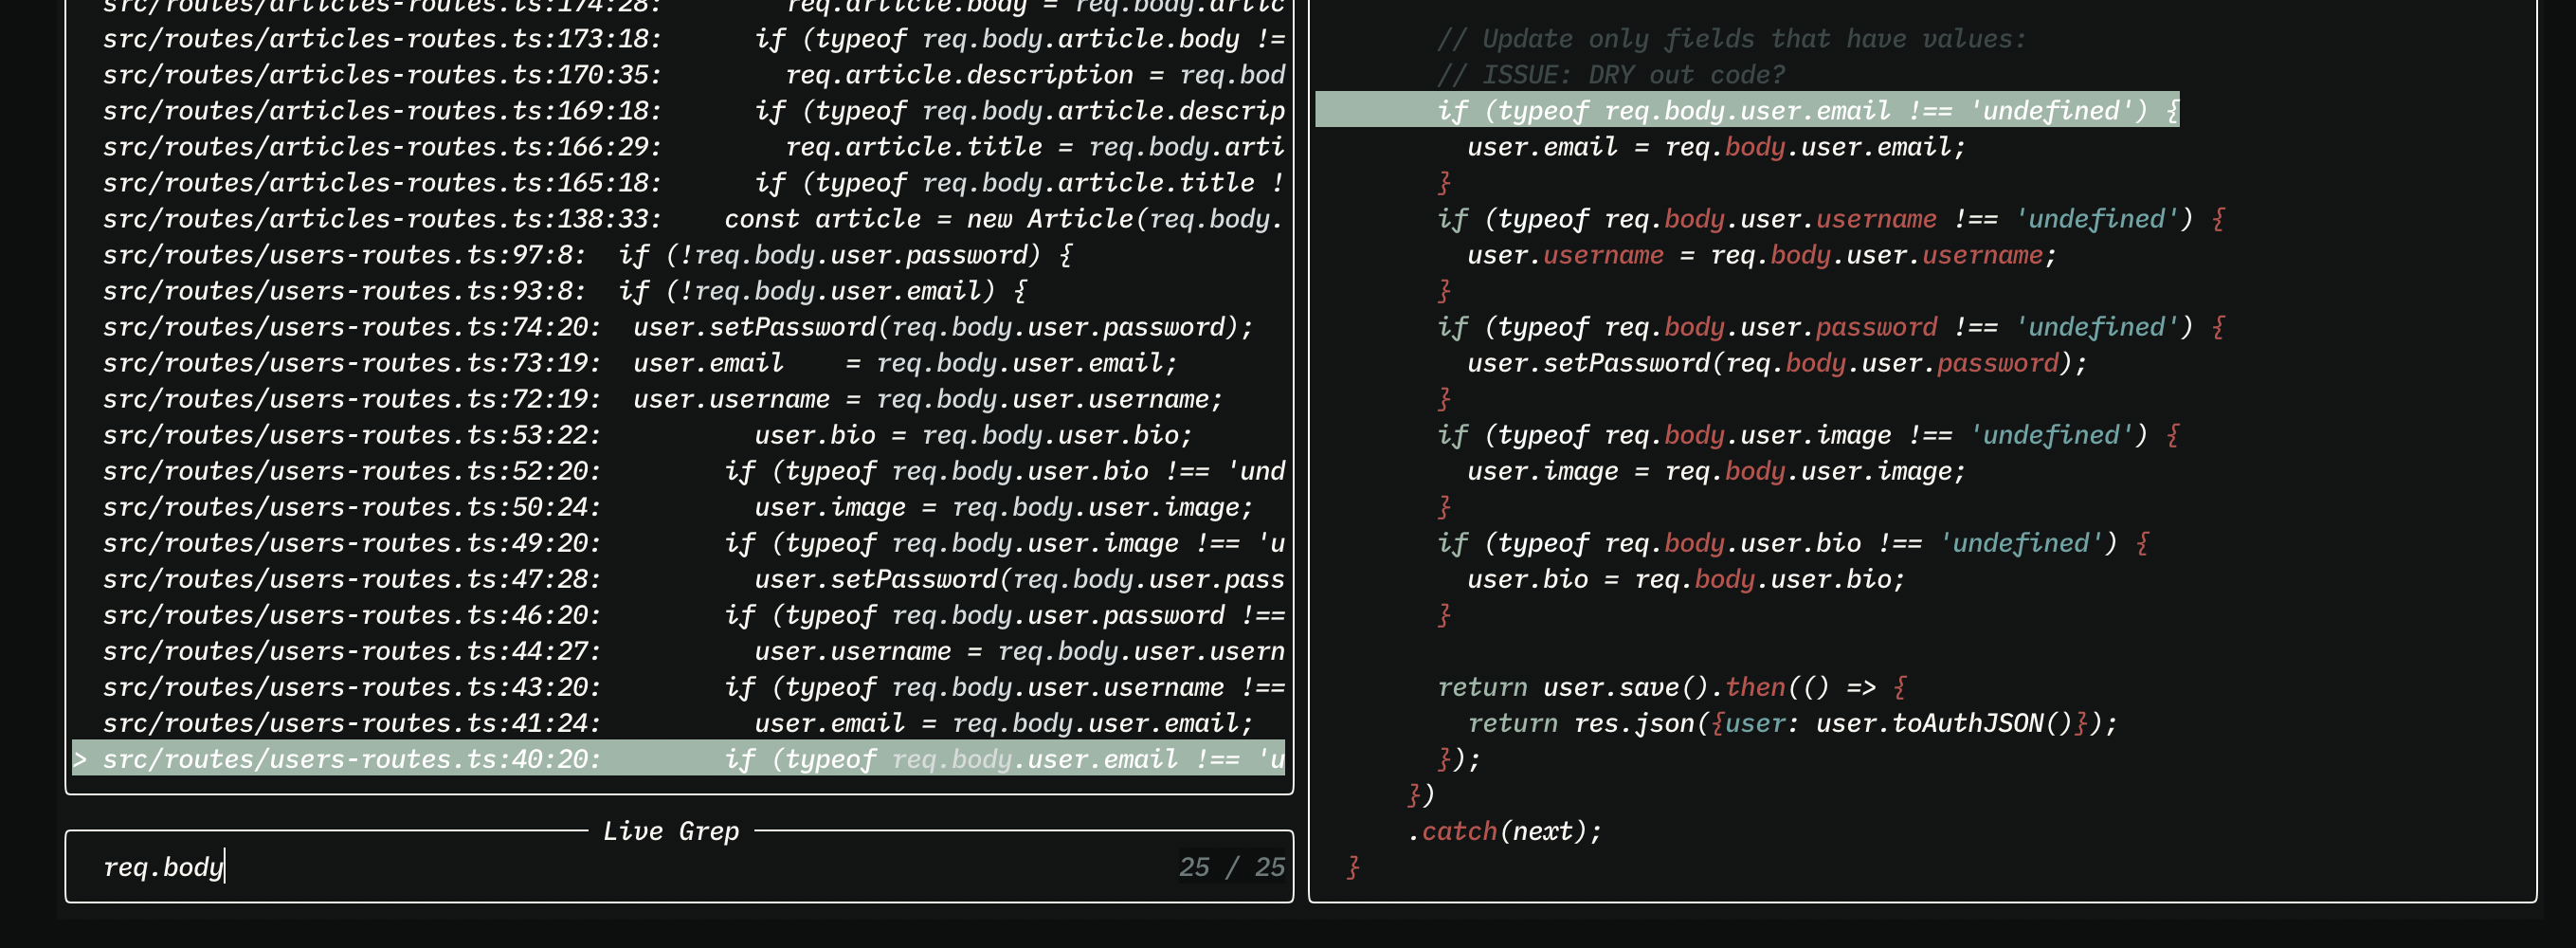
VSCode also allows you to search for strings globally in your project. This can be done from the command line using ripgrep (rg), and can be performed in Vim using a Telescope window.
:Telescope live-grep will bring up a search window like the one shown above.
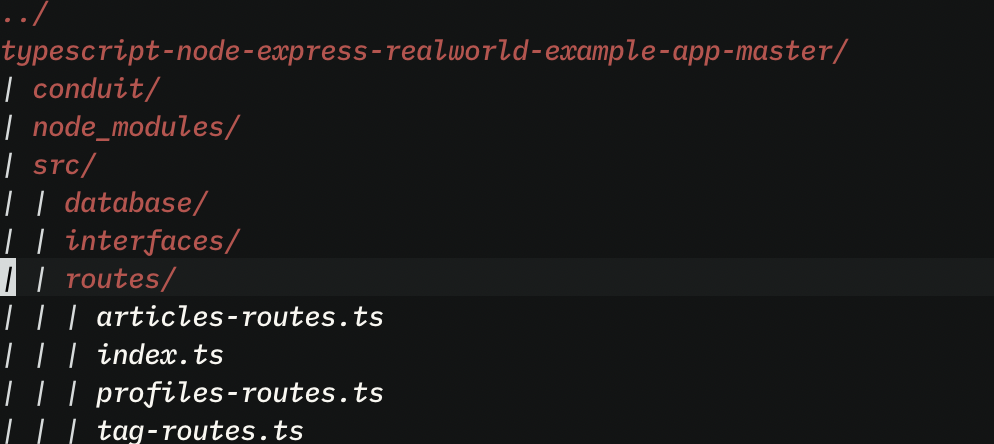
File Tree
Vim actually has a file tree mode built in to it's default file browser, netrw.
Add the following line to your init.vim to enable it.
let g:netrw_liststyle=3
You can then use :Vex from Vim or vim . from bash to open netrw and see the tree view.
Tabs
Vim has tabs built right in - use :tabnew to open a blank one of :tabe[dit] {filename} to open a file.
In a Telescope window, use CTRL-T to open the currently selected file in a new tab.
You can use gt to swap between tabs (and gT for the reverse direction), or g<TAB> to swap between the last two.
I recommend rebinding this to just the tab key.
Colour Schemes
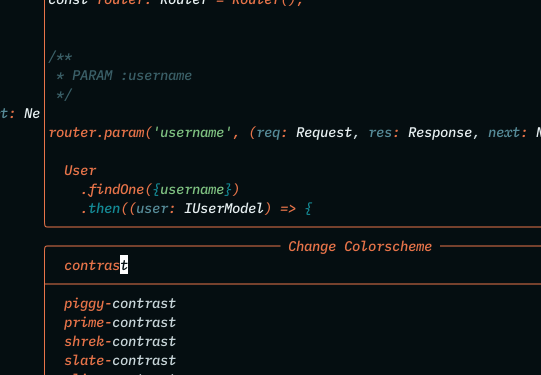 VS Code has this really cute feature where you can use
 ⌘K ⌘T to quickly swap between color schemes.
You can replicate this in Vim with the following command:
:Telescope colorscheme enable_preview=true initial_mode=normal theme=dropdown
I hope you found this helpful! Let me know if you spot any mistakes or have any suggestions over at @angusjfindlay